

Spray foam insulation has gained popularity due to its energy efficiency and ability to create an airtight seal. Many homeowners wonder whether they can tackle this project themselves or if professional installation is necessary. This guide explores the feasibility of DIY spray foam insulation, detailing its advantages, challenges, costs, and safety considerations.
Understanding Spray Foam Insulation
Spray foam insulation is a chemical-based insulating material that expands upon application, sealing gaps and preventing air leaks. It comes in two primary types:
- Open-cell spray foam: Lighter, less dense, and more affordable, offering soundproofing and insulation.
- Closed-cell spray foam: Denser, more rigid, and highly effective at blocking moisture and providing superior insulation.
Homeowners considering a DIY approach should assess their skill level, project scope, and necessary equipment before proceeding.
Can You DIY Spray Foam Insulation?
When DIY Spray Foam Insulation is Feasible
Some situations make DIY spray foam insulation a viable option, including:
- Small-scale projects: Sealing small gaps, cracks, or crawl spaces.
- Readily available DIY kits: Spray foam kits are accessible for minor insulation needs.
- Basic handyman skills: If comfortable with home improvement tasks, applying spray foam may be manageable.
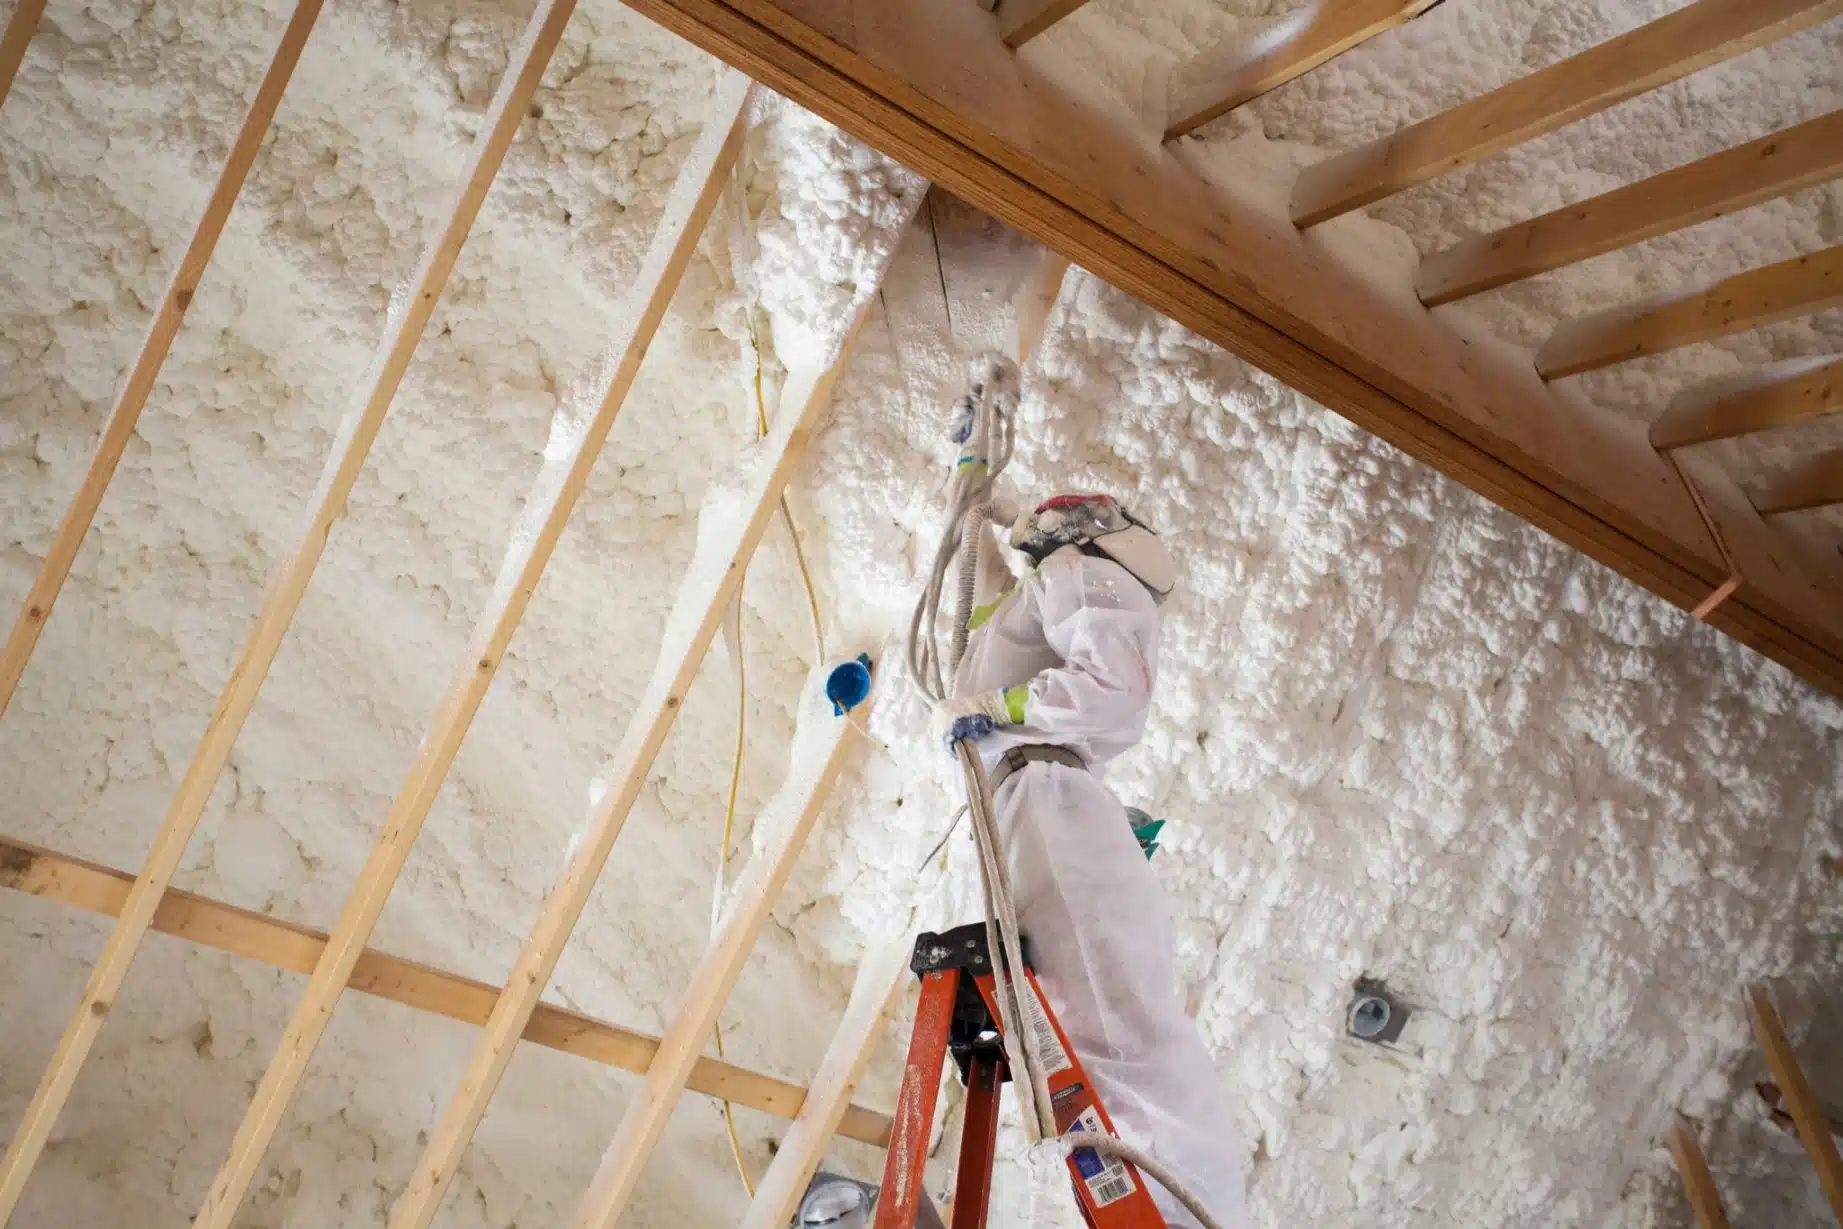
When Professional Installation is Recommended
Larger and more complex projects require professional expertise due to:
- Structural considerations: Improper application can affect a building’s integrity.
- Health and safety concerns: The chemicals used can be hazardous without proper handling.
- Ventilation requirements: Poor ventilation can lead to hazardous fumes lingering in the space.
Step-by-Step Guide to DIY Spray Foam Insulation
For those confident in their DIY abilities, the following steps outline how to apply spray foam insulation effectively:
1. Gather Necessary Tools and Materials
- Spray foam insulation kit
- Protective gear (gloves, goggles, respirator)
- Plastic sheeting or drop cloths
- Utility knife and cleaning rags
2. Prepare the Work Area
- Ensure proper ventilation.
- Clear debris and dust from the surface.
- Cover nearby objects with plastic sheeting.
3. Apply the Spray Foam
- Shake the spray foam canister as instructed.
- Start with a thin layer, as the foam expands.
- Maintain a consistent spray motion.
- Allow adequate drying time before applying additional layers.
4. Trim Excess Foam and Finish the Surface
- Use a utility knife to trim over-expanded areas.
- Cover with fire-resistant materials if required by local codes.
Cost Comparison: DIY vs. Professional Installation
| Factor | DIY Installation | Professional Installation |
| Cost of materials | $300 – $700 per kit | Included in the total cost |
| Equipment rental | $50 – $100 | Included in the service fee |
| Labor cost | No labor cost | $2 – $5 per sq. ft. |
| Potential errors | Higher risk | Lower risk |
| Time investment | 5-10 hours | Faster completion |
While DIY may seem cost-effective, hiring professionals ensure efficiency, quality, and compliance with safety standards.
Safety Considerations for DIY Spray Foam Insulation
Protective Gear and Ventilation
- Always wear gloves, goggles, and a respirator.
- Work in a well-ventilated area to avoid inhaling fumes.
Fire Hazards and Flammability
- Spray foam is highly flammable before it cures.
- Avoid open flames and ignition sources during application.
Chemical Exposure Risks
- Contact with skin or eyes can irritate.
- Allow foam to fully cure before re-entering the space.
Common Mistakes to Avoid
- Applying too much foam: Leads to over-expansion and uneven coverage.
- Ignoring safety protocols: Can result in health hazards.
- Skipping surface preparation: Reduces adhesion and insulation effectiveness.
- Not sealing gaps completely: Leaves room for air leaks and reduces efficiency.
Benefits of Professional Spray Foam Insulation
Hiring professionals provides several advantages:
- Expertise: Ensures proper application and maximum insulation efficiency.
- Compliance: Meets local building codes and safety regulations.
- Warranty Coverage: Many companies offer warranties on installation and materials.
Conclusion
While DIY spray foam insulation is possible for small projects, professional installation ensures the best results, safety, and efficiency. Homeowners in Fresno, CA, should weigh the benefits of cost savings against potential risks before deciding whether to proceed with a DIY approach or hire experts.
Contact a Professional Today
For those considering professional spray foam insulation, Golden State Spray Foam offers expert installation services in Fresno, CA, ensuring quality, safety, and long-term energy efficiency.
Frequently Asked Questions
Is spray foam insulation safe for DIY projects?
Yes, but only for small areas and when following safety precautions.
How long does spray foam insulation last?
Properly installed spray foam can last 20+ years without degradation.
What is the cost of hiring a professional in Fresno, CA?
Professional installation typically costs between $2 and $5 per square foot.
Can spray foam be applied over existing insulation?
Yes, but it’s essential to remove damaged or loose insulation first.
How long does it take for spray foam to cure?
Most spray foams cure within 24 hours, but ventilation is required during this period.
Does DIY spray foam insulation require a permit?
For small applications, permits may not be required, but larger projects should comply with local regulations.
Can spray foam be removed once applied?
Yes, but it requires scraping, solvents, and professional assistance for large areas.
Is spray foam insulation suitable for all climates?
Yes, but closed-cell foam is better suited for extreme temperatures.
What is the R-value of spray foam insulation?
Closed-cell spray foam has an R-value of 6-7 per inch, while open-cell is around 3.5 per inch.
Will DIY spray foam insulation improve energy efficiency?
Yes, when applied correctly, it can significantly reduce heating and cooling costs.